No products in the cart.
Return To Shop
Part 1
Back Up Your iPhone to iCloud
A recent iCloud backup gives you a copy of important information such as settings, app data and other content stored on your iPhone. Before updating iOS, it is sensible to check that your latest backup has completed successfully.
1
Open Settings and tap your Apple Account
Open the Settings app on your iPhone. At the very top of the Settings screen, tap your Apple Account.
This opens the section containing your Apple Account, iCloud settings and other account information.
Tip: If you do not see your name or Apple Account at the top of Settings, you may not currently be signed in to an Apple Account.
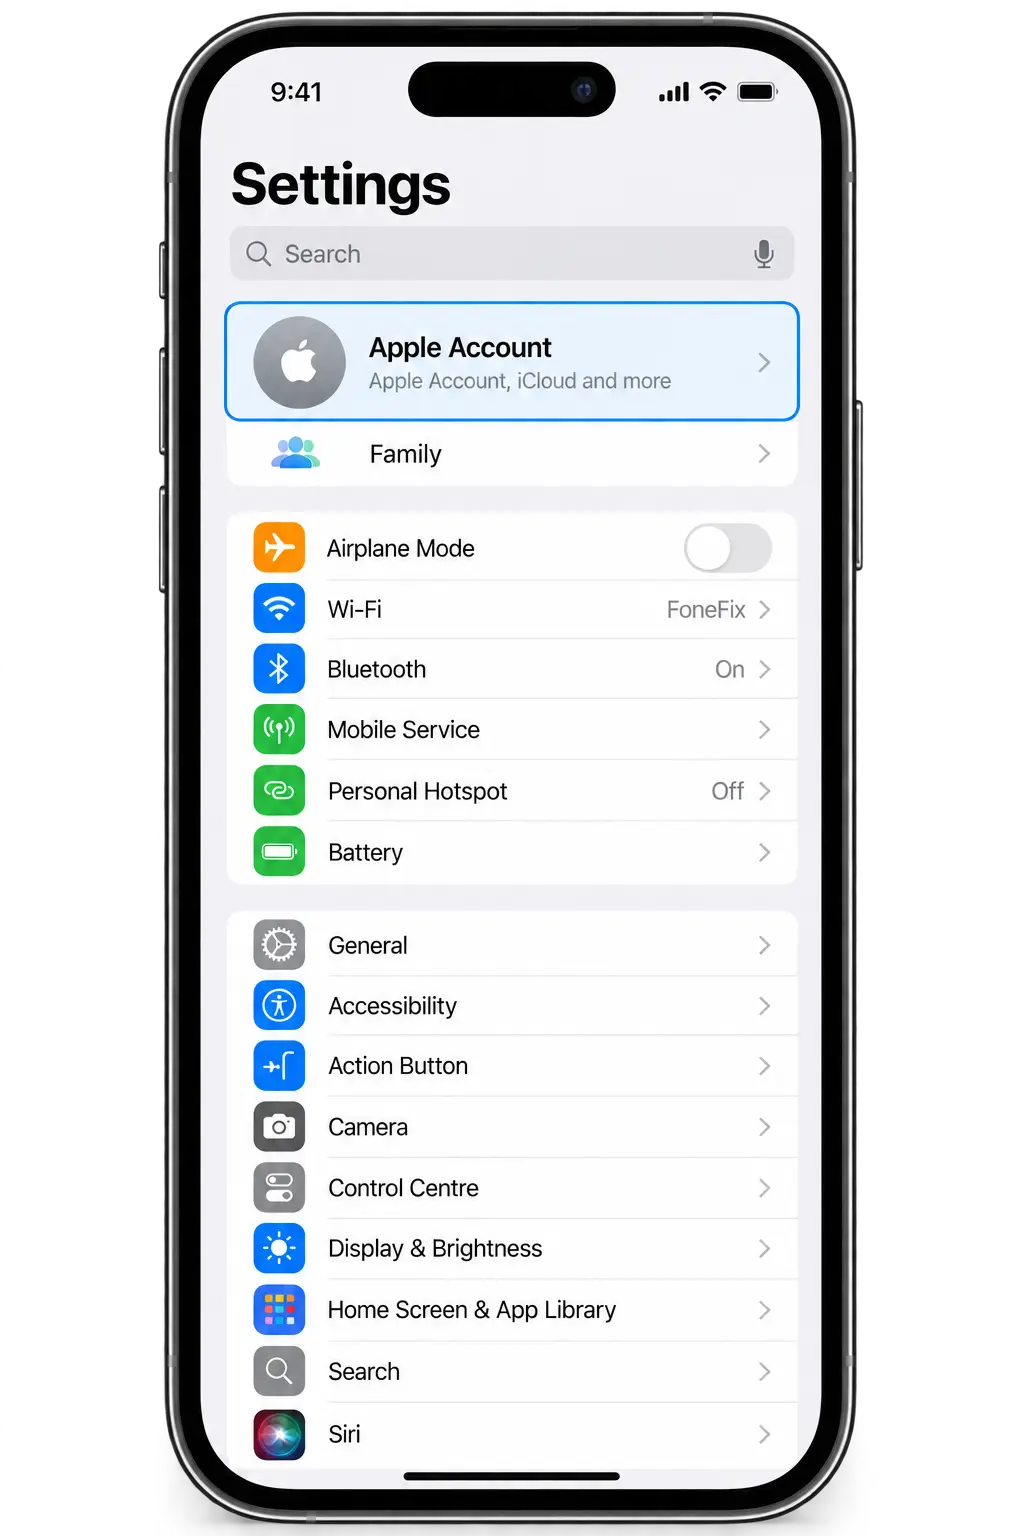
Tap your Apple Account at the top of Settings.
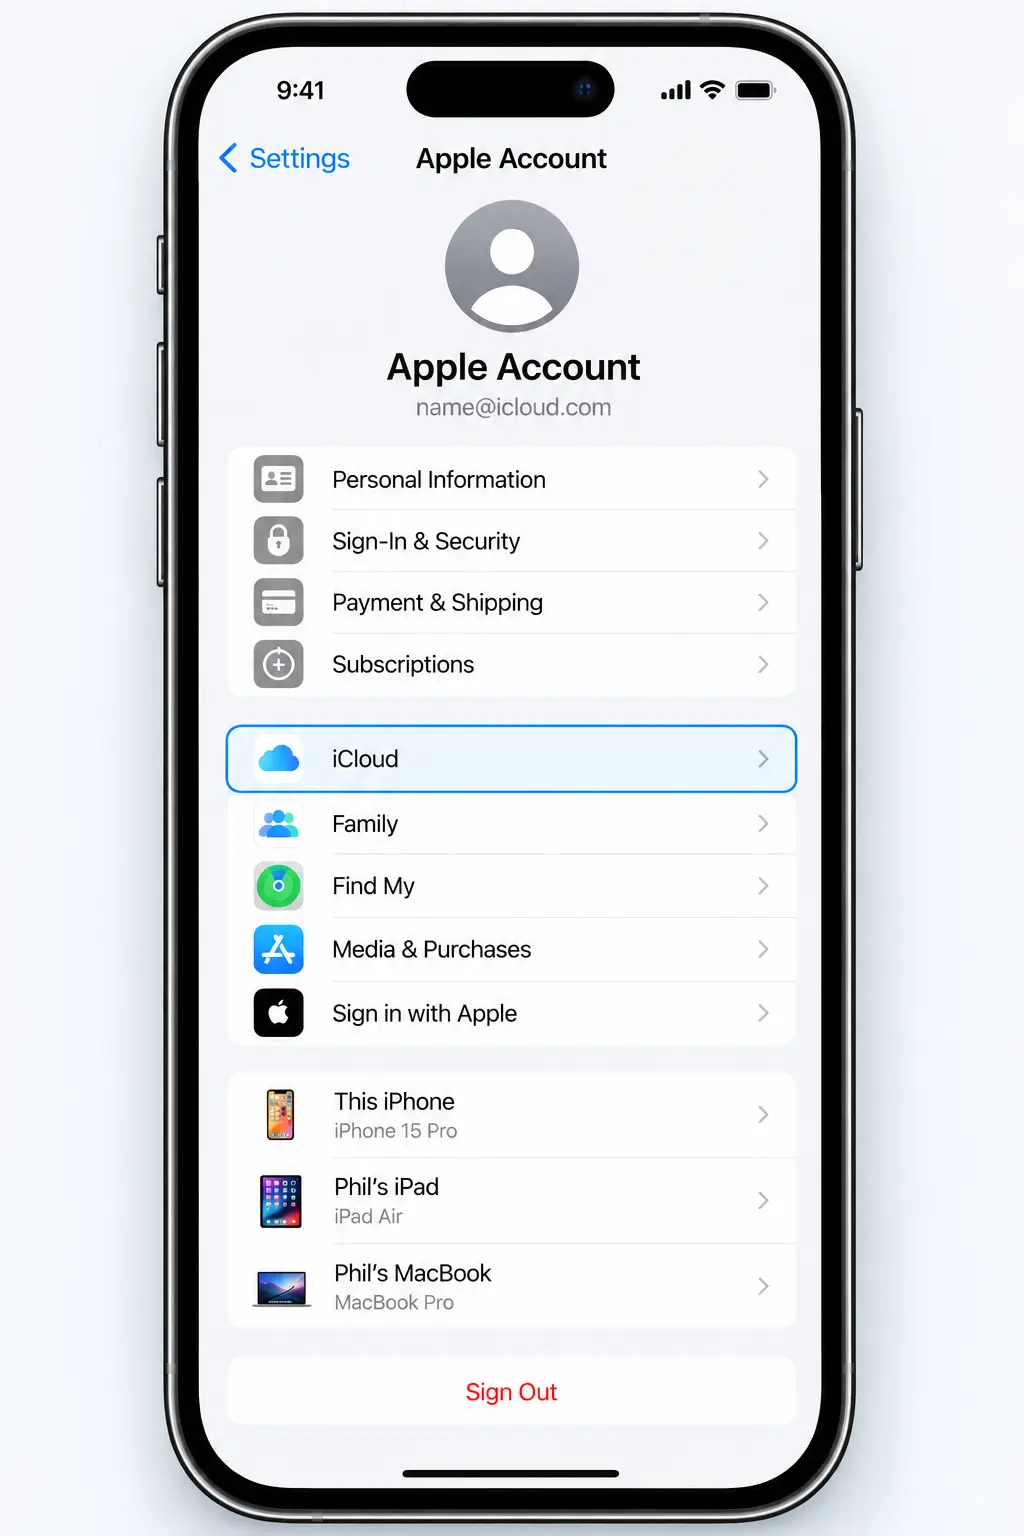
Tap iCloud in your Apple Account settings.
2
Tap iCloud
On the Apple Account screen, find and tap iCloud.
This opens your iCloud settings, where you can see how much iCloud storage you're using and manage the information stored or backed up in iCloud.
Don't confuse iCloud storage with iPhone storage.
Your iCloud storage is separate from the physical storage built into your iPhone. Running out of iCloud space can prevent a new iCloud backup from completing.
3
Tap iCloud Backup
In your iCloud settings, scroll down until you see iCloud Backup, then tap it.
This is where you can check whether automatic backups are enabled and start a new backup manually.
Can't see iCloud Backup?
You may need to scroll further down the iCloud page. The exact position can vary slightly depending on your iOS version and which iCloud features you use.
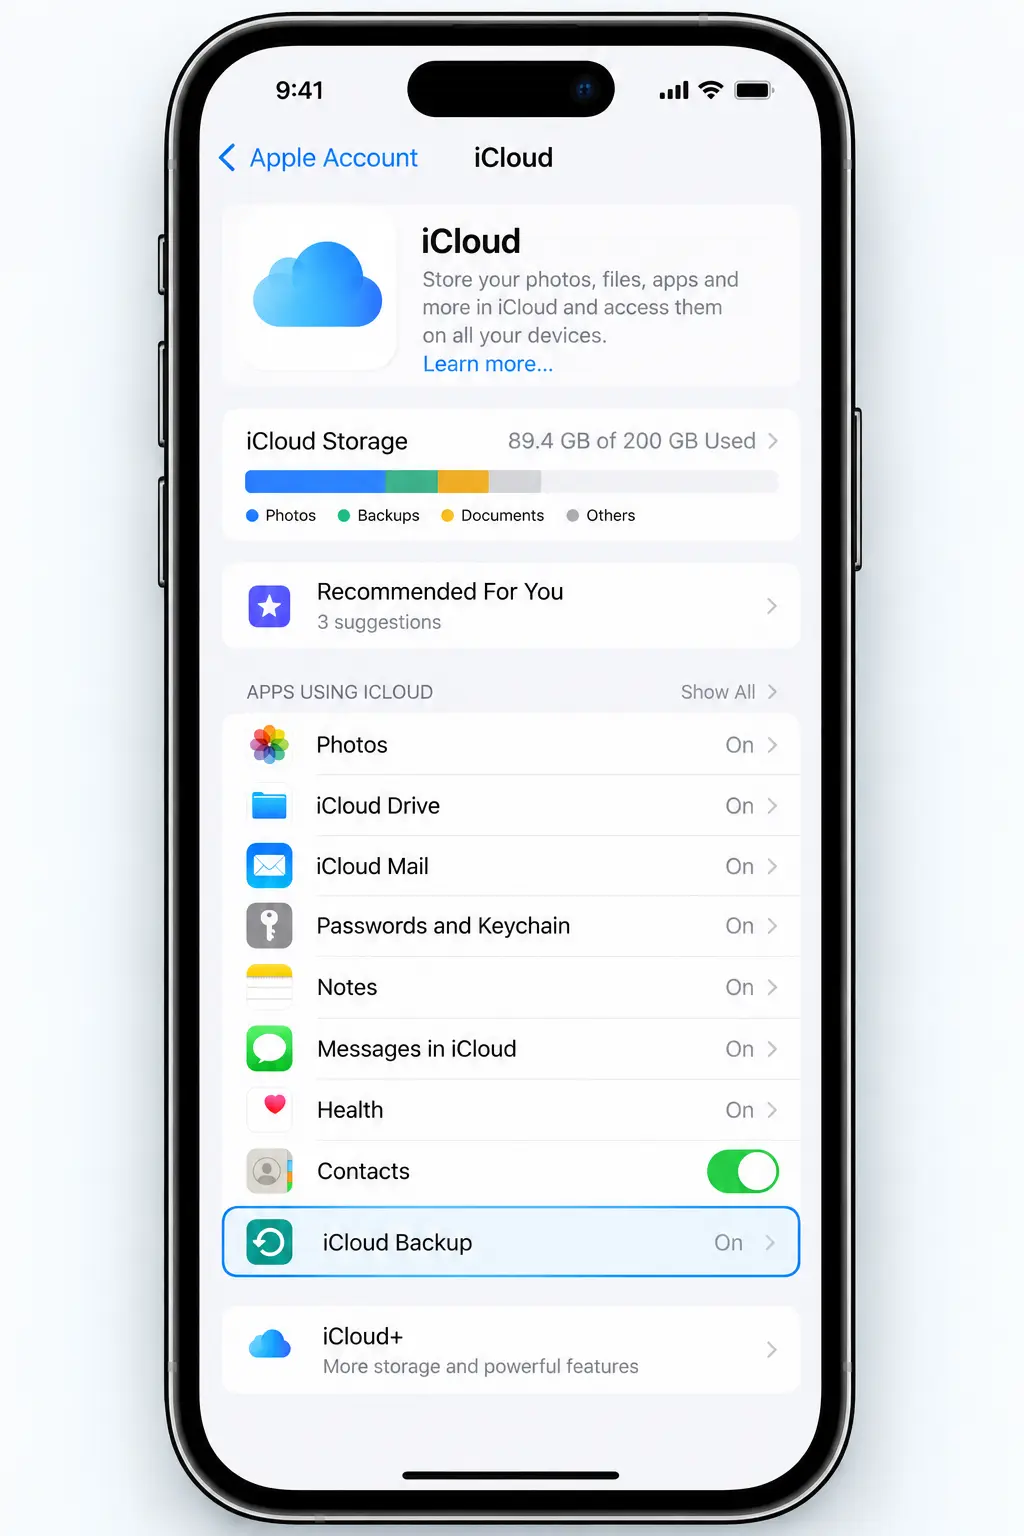
Tap iCloud Backup in your iCloud settings.
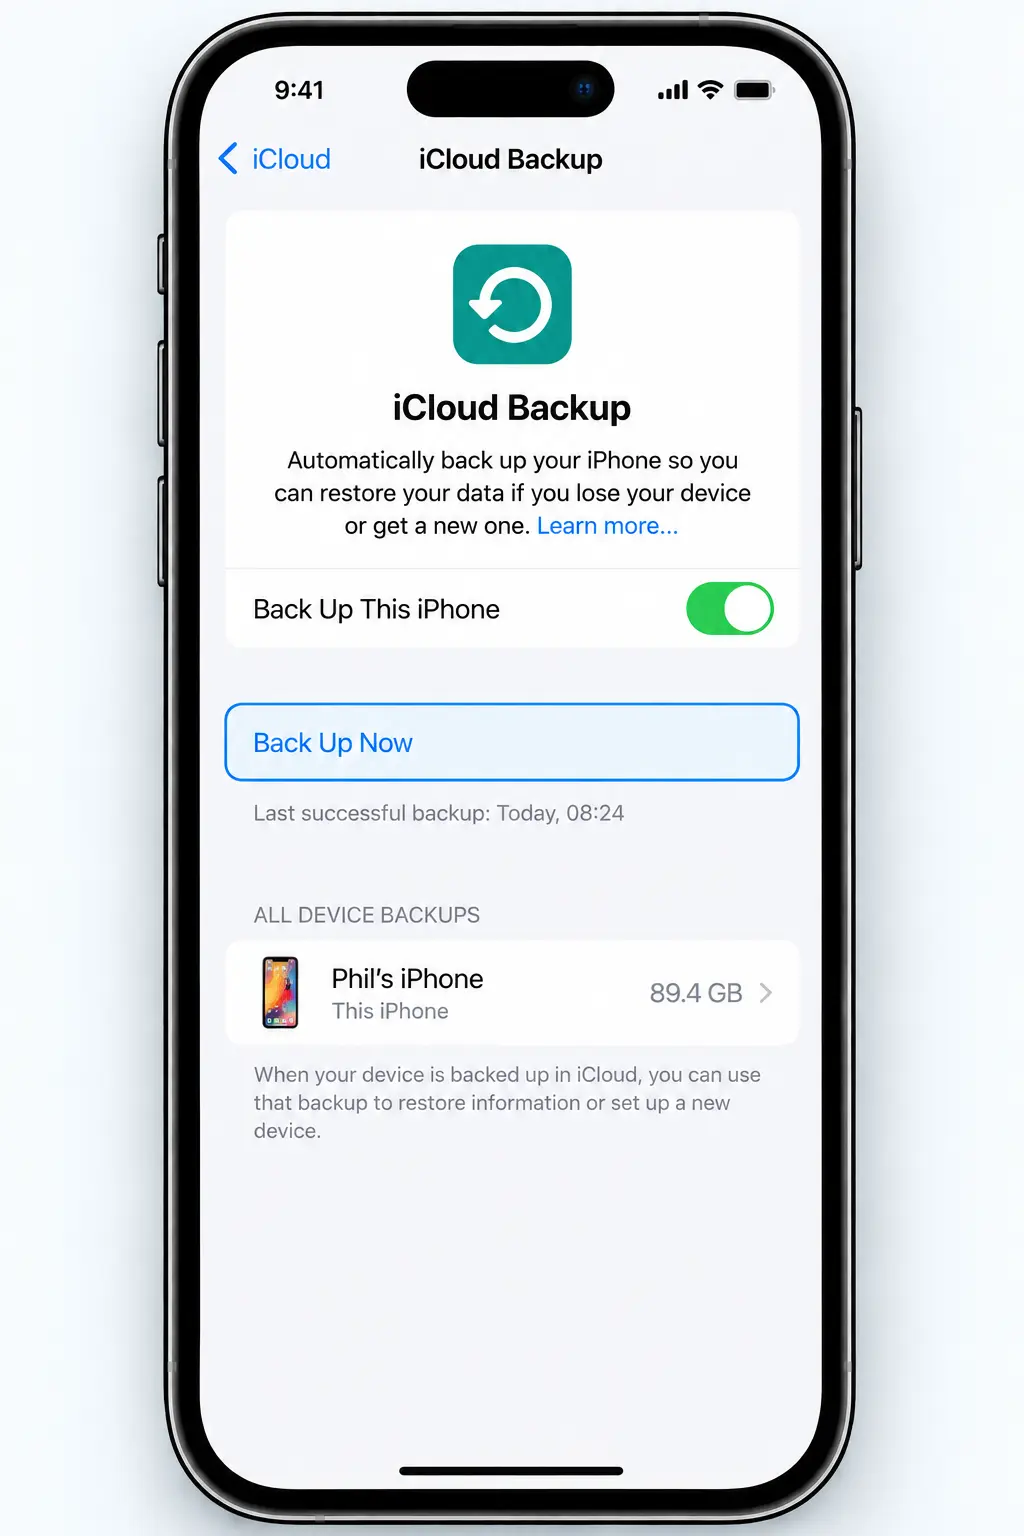
Make sure backup is enabled, then tap Back Up Now.
4
Turn on iCloud Backup and tap Back Up Now
Make sure Back Up This iPhone is switched on. This allows your iPhone to make automatic iCloud backups.
To create a fresh backup now, connect your iPhone to Wi-Fi and tap Back Up Now.
Keep your iPhone connected to Wi-Fi while the backup is running. Depending on how much needs to be backed up and your internet connection, it may take a while to complete.
How do I know it's finished?
Look underneath Back Up Now. Once the backup has completed, the date and time of your latest successful backup will be shown here.
Look underneath Back Up Now. Once the backup has completed, the date and time of your latest successful backup will be shown here.
5
Open Settings and tap General
Open the Settings app again and scroll down until you see General.
Tap General to open the settings for software updates and other important iPhone system options.
Before continuing: Keep your iPhone connected to Wi-Fi and, particularly for a larger update, connect it to a charger or make sure it has plenty of battery remaining.
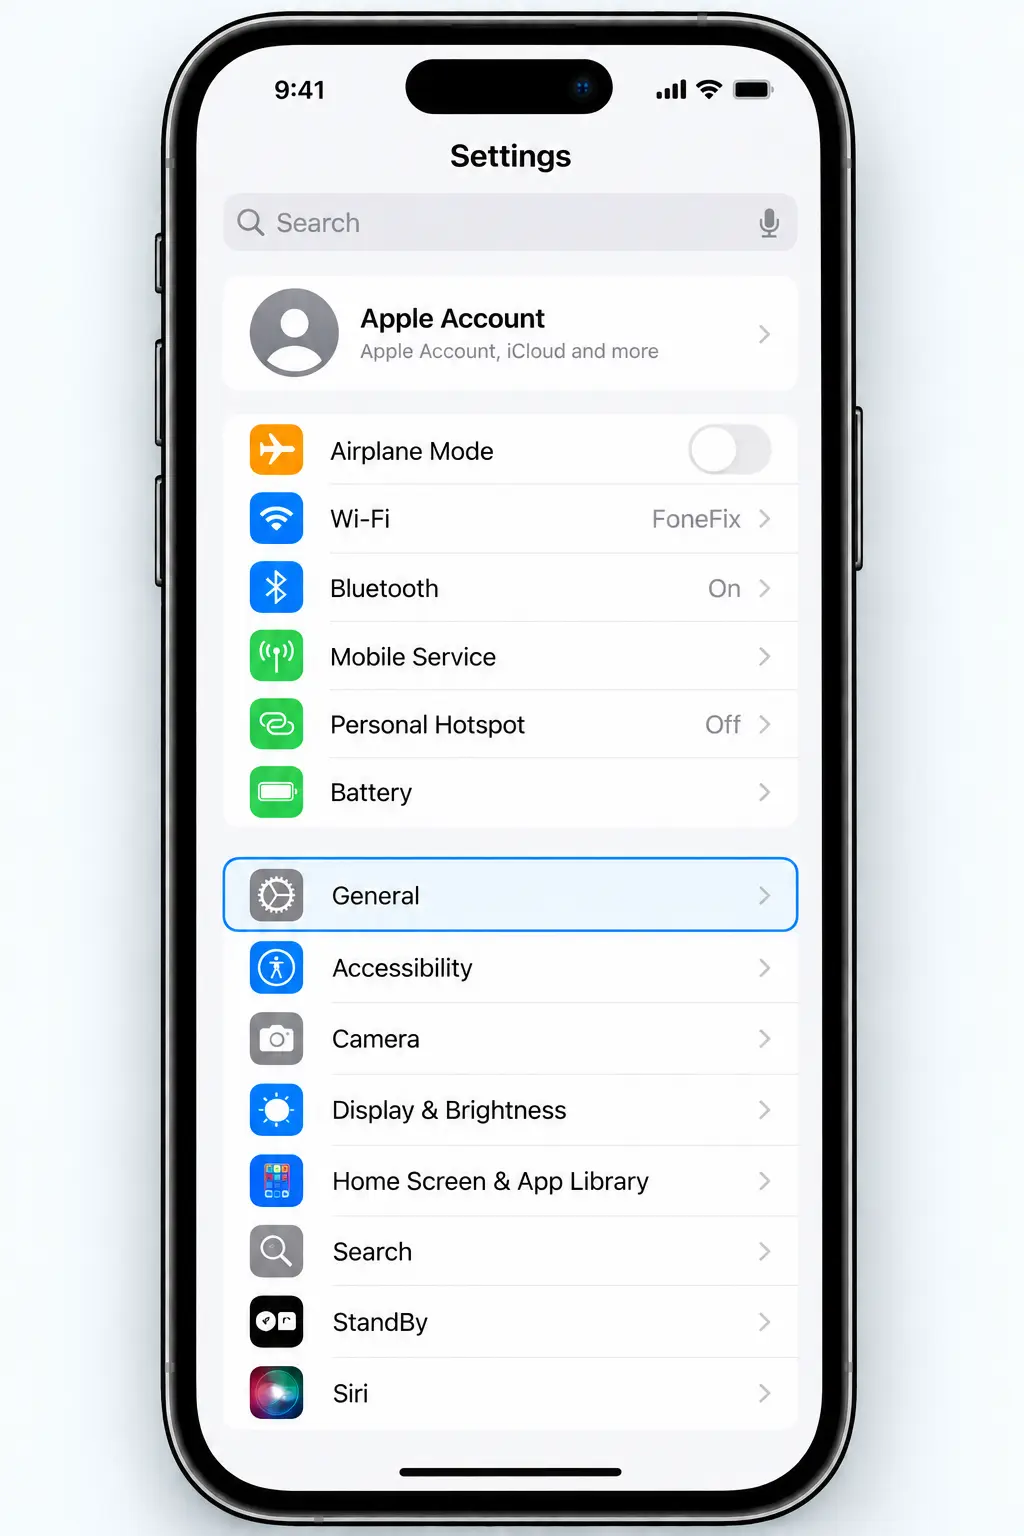
In Settings, scroll down and tap General.
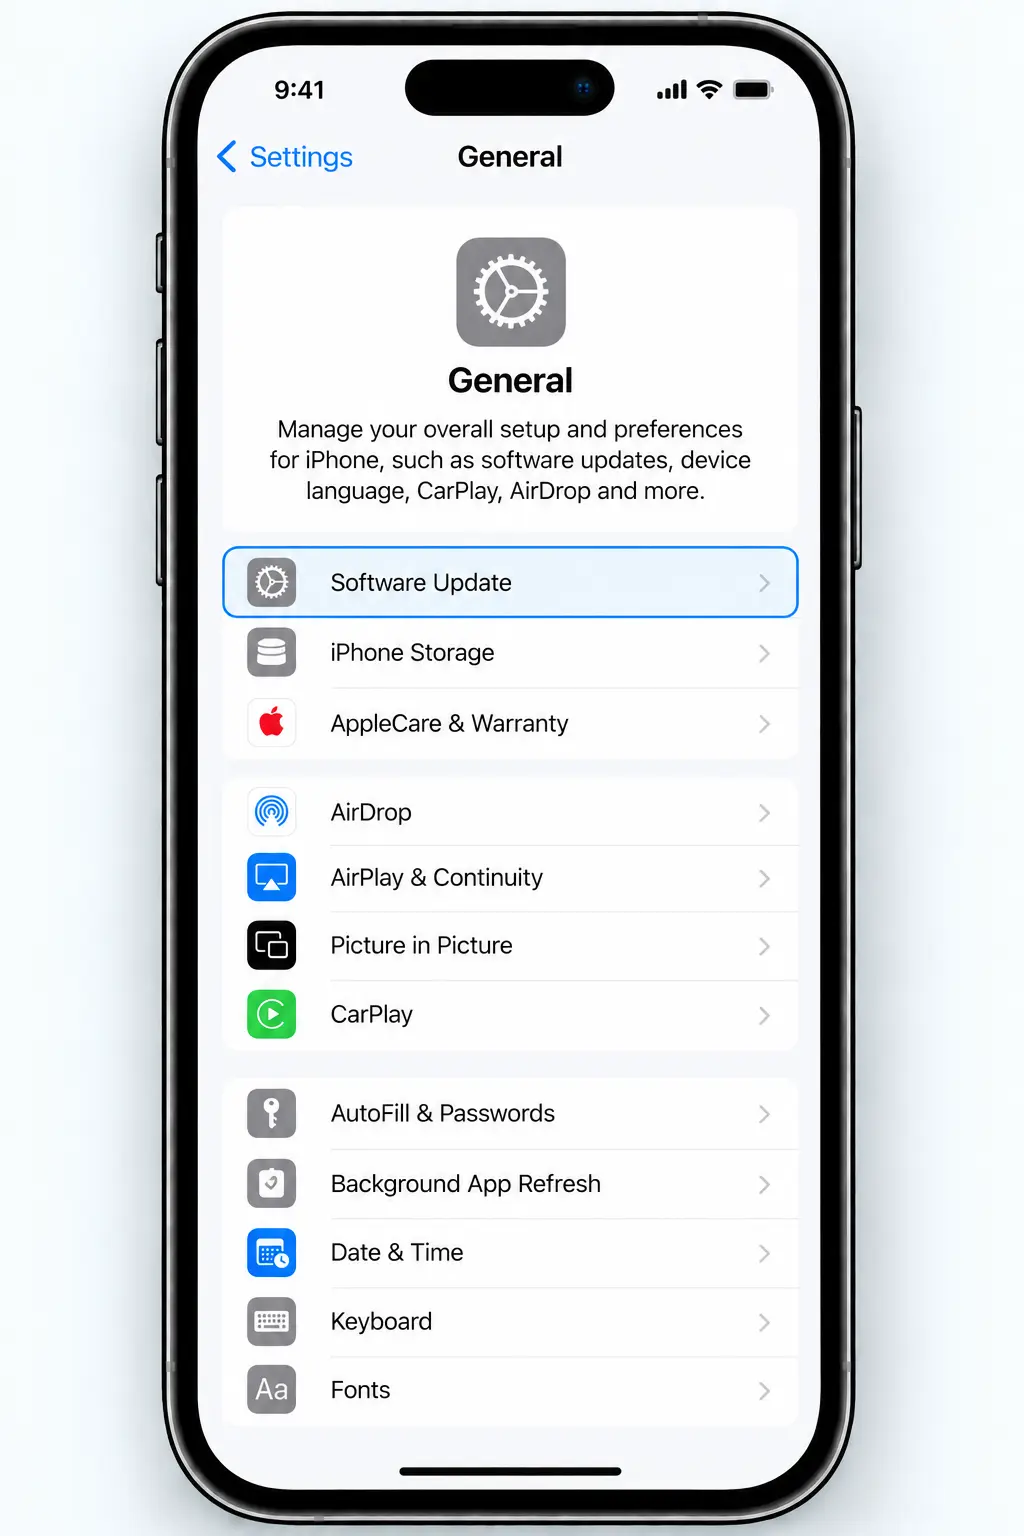
In General, tap Software Update.
6
Tap Software Update
At the top of the General settings screen, tap Software Update.
Your iPhone will check with Apple to see whether a newer version of iOS is available for your device.
Give it a moment.
The Software Update screen may briefly show that it is checking for an update before displaying the latest version available for your iPhone.
7
Download and install the iOS update
If an update is available, your iPhone will show the new version along with information about the update.
Tap Update Now to begin. Depending on your iPhone and the update available, you may instead initially see Download and Install.
Your iPhone will restart.
Once the update is ready to install, the iPhone will restart and display the Apple logo and a progress bar. Don't try to turn the phone off while the update is being installed.
That's it.
Once the update has finished, your iPhone will restart normally. You may be asked to enter your iPhone passcode before you can use it again.
Once the update has finished, your iPhone will restart normally. You may be asked to enter your iPhone passcode before you can use it again.
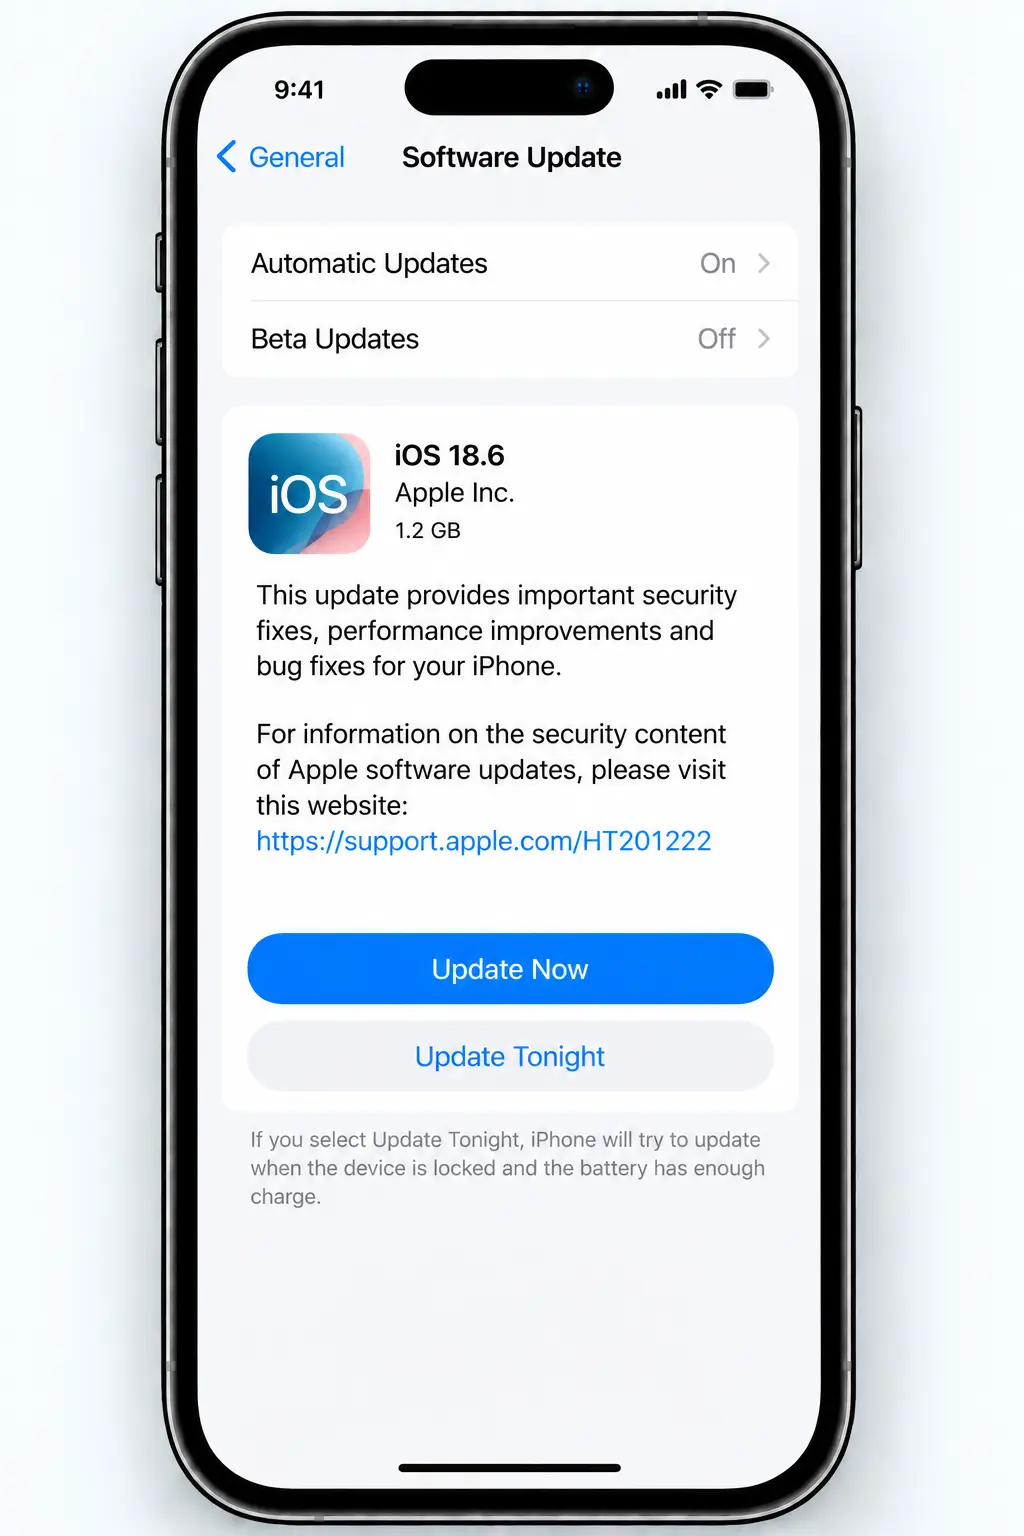
If an update is available, tap Update Now.